In today’s digital age, users have to face issues due to the inaccessibility of Wi-Fi networks to each and every corner of their premises. In the meantime, Wi-Fi extenders have entered into the game. They are truly versatile & intuitive tools that are also referred to as Wi-Fi boosters. Among all the available WiFi extenders Netfun Wi-Fi extender stands out as the most reliable one that truly sounds like a bargain. But, in case you are feeling unable to use your smart device or set up a gaming station, Netfun WiFi Extender Reset is the one-stop solution for you.
By preferring to reset the Netfun extender, users can be able to boost the signal as well as get rid of dead zones. It is also the way to achieve improved wireless coverage. If you also have the desire to stay connected with your friends & family and overcome all sorts of difficulties related to your Netfun Wi-Fi extender, you are absolutely in the right place.
Looking for a way to enjoy a stable wireless connection? Netfun WiFi Extender Factory Reset is the way that you can rely on. So, what are you waiting for? Let’s scroll down the blog and become familiar with the complete procedure to reset the extender that you possess.
What Are the Requirements for Resetting Netfun Extender?
Are you thinking about to reset Netfun WiFi Extender? Well to accomplish the whole process, it is a must for you to be aware of the key essentials that you must have. If you don’t have knowledge about the things that are required for you to kick-start the reset process of your Netfun extenders, need not worry at all! Here in this section, you will definitely understand the key requirements related to it. Let’s keep an eye on them.
- Netfun Extender
- Stable internet connection
- Correct login credentials
- Damage-free Ethernet cables
- Reliable power outlet
- Minimal physical obstructions
- Strong Wi-Fi connectivity
- Up-to-date web browser
How to Factory Reset The Netfun WiFi Extender
There are various reasons that arise for the need to perform Netfun WiFi Extender Reset. To help you perform the whole reset procedure more conveniently and rapidly, we have outlined two key methods here. The key steps to reset your extender by using both of these methods have been mentioned below. Let’s have an overview of all of these steps one by one.
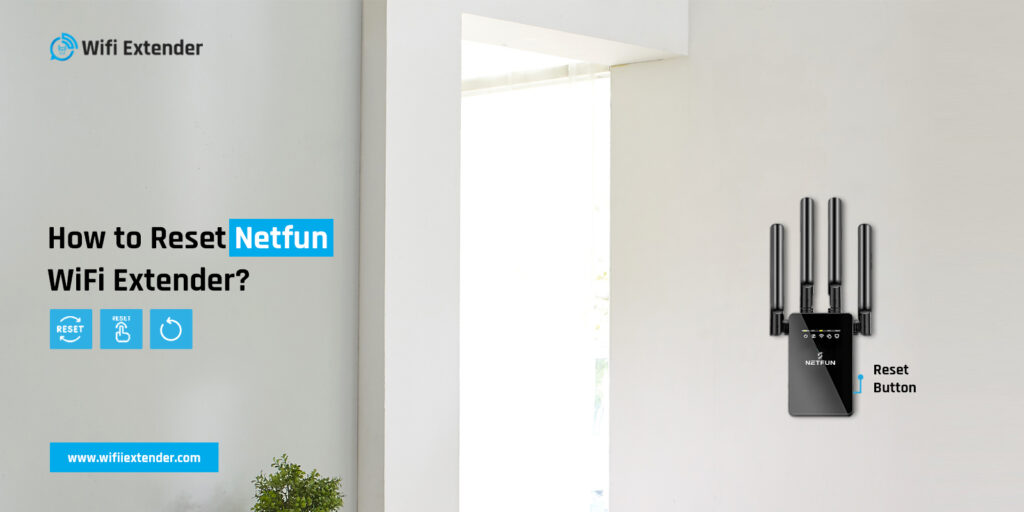
Using the Reset Button
- First of all, locate the Reset button on your extender.
- In the next step, Press the Reset button with the help of an object like- a pin or paperclip.
- Hold this button for at least 10-15 seconds.
- Once the LED on your Netfun Wi-Fi extender starts blinking, release the Reset button promptly.
- Now, your extender will start to reboot itself.
- Wait patiently for some time and let the reset process be completed.
- As soon as the reset procedure is accomplished, your extender will return to its factory default settings.
- After that, you will have to reconfigure your extender as all the settings will be erased after the completion of the reset procedure.
Via Web Browser
- To initiate the process, turn on your Netfun extender.
- Next, connect the extender network to the smart device via a wired or wireless connection.
- Now, open a web browser on your smart device.
- Type the correct IP address-192.168.0.1 of your extender in the address bar of the web browser.
- After that, you will be directed to the login page.
- Thereafter, you have to enter the username and password of your extender in the fields.
- In this step, tap on the Login button to access the login page.
- Now, click on the Settings or Administration tab as per the model of extender that you have.
- Here you will find the “Factory Reset” or “Reset to Default” option. Hit on this option once.
- Once you click on the Reset option, click on the “YES” or “OK” button to confirm the reset process.
- Wait for some time for the reset procedure to be completed successfully.
- Last but not least, you have to reconfigure your Wi-Fi extender, as it will get back to its default settings.
Reconfigure the Netfun WiFi Extender After Reset
Simply put, after Netfun WiFi Extender Factory Reset, all the settings that you configured earlier will be removed soon. This way, users become unable to access the features of their extender. If you are also one of those users and have performed the reset recently, it is advised that you ought to reconfigure your extender shortly.
Don’t you know the key process to follow for the reconfiguration of your Netfun Wi-Fi extender? To help you out we have mentioned the steps involved in the reconfiguration process. Let’s explore all of these steps.
- In the first step, connect your device to the network of the router.
- Now, open the web browser on your device.
- Type your extender’s IP address-192.168.0.1 in the URL bar.
- In the next step, use the login credentials to log in to your extender’s web interface.
- After that, you will be directed to the smart setup wizard of your Netfun Wi-Fi extender.
- Thereafter, set a new network name (SSID) and password for your network.
- Now, follow the on-screen instructions for Advanced Settings.
- Finally, you are done with the reconfiguration process of your extender.
Bottom Line
Hopefully, after taking a deep into the information given in this blog post, you will have a clear understanding of how to perform Netfun WiFi Extender Reset. It allows you to amplify and expand your wireless network range. It does not matter that the signal strength is low or non-existent, you can achieve success in boosting the speed & the coverage of your internet connection through the reset of this valuable device. In the simplest terms, it is the method that will enable you to improve your internet connection.
FAQs
How to Setup the Netfun Wifi Extender?
If you are in need of a Netfun wifi extender setup, you have to select the appropriate location for your Netfun extender>plug the extender into a power outlet> connect your smart device to the extender’s Wi-Fi network>open a web browser>enter the IP address of your extender>log in to the extender’s interface using your username and password>follow the on-screen instructions to configure the extender.
How do I connect my WiFi extender to a new router?
To connect your Wi-Fi extender to a new router, all you need to do is- Login to your Wi-Fi extender using the correct login credentials>Navigate to the Wireless section> Select Wireless Settings>Click on the Scan button>Select the name of your new router’s network> Enter the password> Click on the Connect button> Wait for sometime> unplug the extender once the connection is established.
Why won’t my WiFi extender connect to my router?
There are so many reasons responsible for your Netfun Wi-Fi extender not connecting to your router. These include- the excessive distance between your Wi-Fi extender and router, unmatchable wireless settings, hardware issues such as damaged antenna, corrupted processor, etc, physical obstructions, outdated firmware of your extender, and many more.
Why is my Netfun wifi extender not working?
If your extender is not working, there can be various factors responsible for this- Incorrect setup, poor internet connection, physical interruptions, outdated extender’s firmware, hardware issues with the extender, and many more.
How do I update my Netfun Wi-Fi extender firmware?
To begin with the upgrading procedure of your Netfun Wi-Fi extender’s firmware, you have to follow a few key steps. These steps involve- Connect your smart device to the extender’s Wi-Fi network>Open a web browser>
Log in to the extender’s interface using your IP address, username, and password> Tap on the Settings menu> Click on the Firmware update option>Download the latest firmware version>Upload the firmware file> Wait patiently> Restart the extender.